Well being like almost every other builder : back log and low on free time.
I still dicided to get some gunpla for the future and i'll tell you why.
I bougt a house YEAH!! here are 2 pictures 1 of the front and 1 of the back.
This is the front.
And this is the back.
Its a house with a decend living room, big kitchen, 3 bedrooms on the first floor and 1 on the attic.
Speaking about the attic, the room there will become my new hobby-room.
Enough space to store everything and go my own way.
The other side of the story is that, at least till cristmas i wont be building anything.
I'm hoping to have the construction operations done before cristmas so i can still build some models in my vacation.
Speaking of models these are the ones i got from my dealer of models Morgenroete Inc..
The Regen Duel.
And last but not least a real must-have : The Sinanju
(both images are from dalong)
zondag 1 november 2009
zaterdag 17 oktober 2009
17-10-09 text update (poll/update combination)
Here is a small text update concerning my new poll and to tell you my progress.
First ill give you my backlog so you can combine them with the poll.
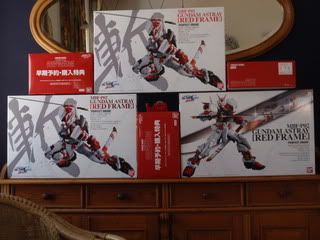
-PG red frame with clear parts.
-PG gp01.
-MG sword impulse
-MG exia IM
-MG infinite justice
-HG chaos
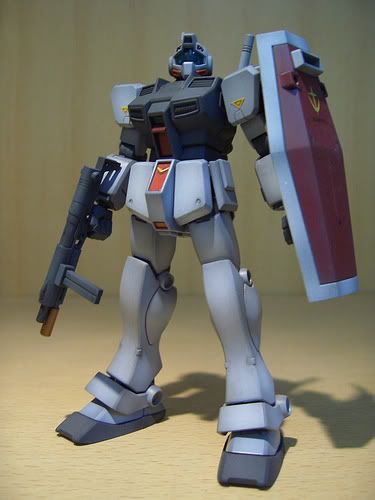
I also have a MG gm custom but this is more for testing my new techniques.
But if you have a good idea for this one please tell me.
And for the diorama poll answer i already got a model in mind (my already build MG impulse).
Well thats for the poll just give me your most craziest ideas and i will keep them in mind for the next project wich i wont start this year.
I'll tell you why soon.
Then for my progress.
At the moment of speaking im busy with my Aegis.
got the detailg work and decals still left to do.
I really want to finish it soon but im not making a hasty job.
Really dont want to screw it up.
Hope to hear as much ideas as possible from you.
dinsdag 6 oktober 2009
Aegis - almost done.
Well im almost done with the Aegis. its finaly coming to the final stage.
Before its complete i need to paint te eyes, details and put some waterslide decals on him. it will be about a few hous of work.
I also got some decal fix (could'nt find it anywhere until i found out that a hobby shop near my house was selling it).
It's from the brand humbrol, did anyone used it before and do you have any tips?
The shop owner told me how to use it and it goes like this:
You should aply the decal fix first on the model - then you put on the decal of choice (can be any kind of decal)- turn the decal to the desired position - let it dry.
And last but not least a picture i took from my Aegis, as i promissed.
Painting was not completly done in the weekend, so here it is :
So what do you say ?
I will explain the minor adjustments about the model when it is complete.
donderdag 1 oktober 2009
Airbrushing my favourite colour PINK (if i was a girl).
Well a small text update i started on airbrushing the most parts of my aegis.
Got all the pink parts in their new (little bit lighter) pink.
I also gave the white parts a coat of white paint, they look really good.
Trying to get all the parts pained by the end of the weekend, and then i will make a photo update for my fans/readers (if i got any hahahaha).
Do you (my blog-readers) have any nice idea's to make my hg aegis a bit more special.
Got some ideas of my own that i wont tell you yet.
It will be nice to hear some things and please just only visual ideas no mods please.
zondag 27 september 2009
Off topic.
Well here is an off topic update, wich im making because i was reading an other blog latley. The blog topic was about the unity we have in our intrests, but at the same time how diffrent we are induvidualy. And i share the the opinions wich i heard there. Some people post only once or twice every week, some only once a month, some people pst only about models there building and some about everything thats about gundam.
The blog i was reading is about a bunch of people who are communicating longer than me about gundam and other stuff. I hope that this blog can do a bit off the same. I like to hear people's opinion about my models and their advices. Altough im not posting as much as i want (and maybe as much as you want) but i think, if i do some more effort i can do some more posting and hopefully you'll like it.
Well i think i'll stop here for the moment and hope to hear some of you're opinions. Maybe you dont like me talking about stuff like this hahahaha.
To all my readers : thanks for reading and that you'll continu it and keep commenting.
zondag 20 september 2009
RVF-25 part 2
Well as i promissed i would make the plane a bit more colourfull.
So here are sme pictures without the decals.
And here it comes the extra pieces added are the one and only super parts, wich can be equiped with at least the 4 main macross models.
With the decals on it it will be an awesome fighter.
I forgot to mention in my last message that i wont transform this green radarloving fighter model to his battdroid mode or gearwalk.
This all beacuse of my narrow free time, got so many kits to build hahaha.
Well some pictures with more detail than the first 2 i took.
I did not put the radar dish on it so you can see the super parts better.
Rear view of the fighterplane.
Under the wing look.
Dont mind the background.
And now when i just posted al the pictures i found out the i forgot to put the large boosters on the wings (feeling pretty dumb now).
You will eventually see them in the new updates.
I also have to make a photocabinet where i can put my models in for photosessions, but thats an issue wich can wait.
donderdag 17 september 2009
non gundam model : RVF-25 part 1
Next to my Aegis and Zaku project im doing a macross model and since my poll showed some intrest in non gundam models i will do one.
Im doing a bit more information about this ones since most of the readers won't reconize it(at least that's what i think).
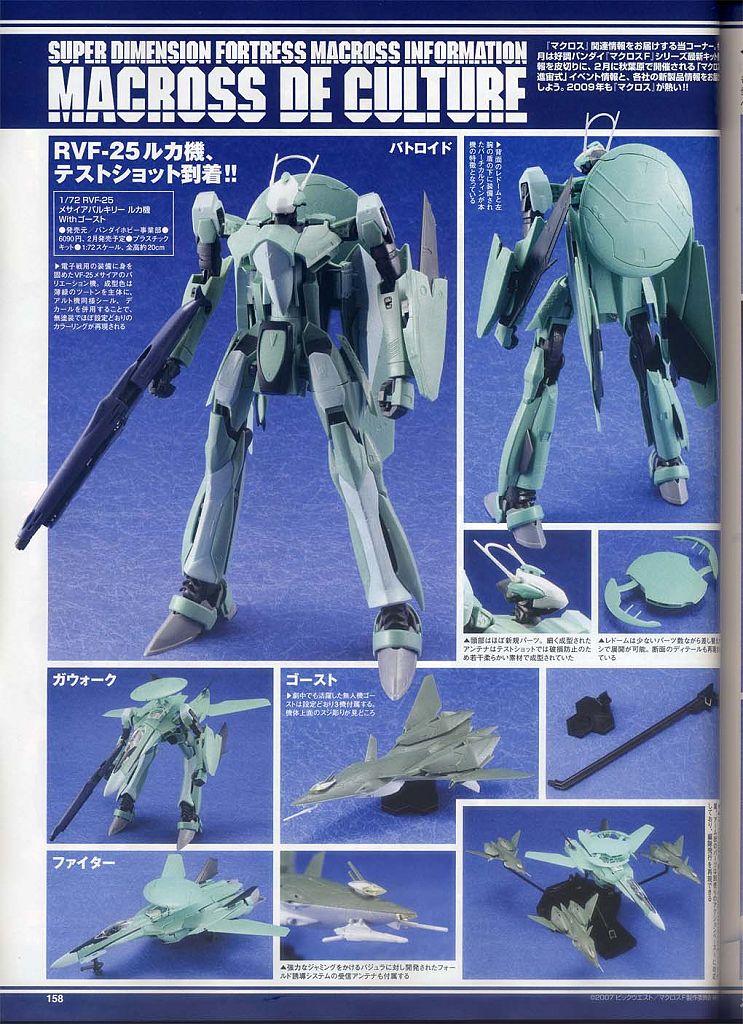
The RVF-25 is a plane/battroid/gearwalk of the pilot Luca from the macross frontier serie.
Luca is the pilot who gatters most of the info on the battelfield (take a look at his machine and you'll see why).
He also has 3 non piloted planes with him wich are for information gathering and more(you should really see the serie).
These planes are called ghosts and there about 1/3 the size of the RVF-25.
I really like the models from macross frontier, the look really agile an fast.
And on top of that all of the 5 main models are really unique in their own way.
My favorite the RVF-25 of course is the one that is used for mainly information gathering and back-up.
Here is a picture of my model without the decals and panel lines.
As you can see its really plain without the decals and panel lines.
Well to cheer you guys up, ill give you the promise i will add even more than just the decals and panel lines.
For the ones who have already seen the series, they probably know what im talking about.
Now lets talk about the model itself.
Its really good detaild and has many small parts. the transformation construction is good at most of the sections, except for some like the nose piece.
The nose piece looks a bit loose if you touch it.
And i have to say that the legs are a real pain in the ass. they are hanging on the waist and are a bit to heavy to stay in place.
They should have come up with some sort of locking mechanism.
And the last big bummer the gun given to the RVF-25 cant be put underneath the fighter, it has a fin underneath wich makes it impossible (it would have looked so good)
Next to those minor bits there are many good ones wich make up for the poor.
And one of them is that each part can be put real tight next to the other one, and i mean real tight!
Another good point is that the model is a challenge to build, its really diffrent compared to a gundam.
This is it for the first part i will post the next part as soon as possible.
zondag 6 september 2009
Aegis in uprise.
Well cant wait to long with some news.
I started with airbrushing some of my aegis parts with tamyia paint.
And it is 300% better than the createx paint i got with the airbrush.
I cant rub it off as i could do with createx paint.
The only thing now thats bothering me a bit is that, tamyia paint is more expensive than createx and painting 1/100 model takes a hole lot more paint than a 1/144 (gm group-build). So still searching for some soluitions.
Here are 2 pics i took of the painted parts.
Also the poll i posted has came to its end, and the results are :
yes 7
no 3
not sure 1
doesnt bother me.. 5
Well since "not sure" and "doesnt bother me" are a bit 50/50 answers, ill split the total and of the points and spread them equaly over yes and no.
That means yes gets 3 point more and no to.
And that will bring the final score on : YES 10 points NO 6 points.
A big diffrence and i will posts some messages of models from other series.
Still Gundam wil keep the upperhand on this blog, stay tuned...
zondag 30 augustus 2009
Luck is on my side.
Past week was pretty good and i had a lucky moment.
I was able to buy the PG GP01 from a fellow builder solid.
With it came a set of gattling guns (wich solid was able to take with him from japan for me).
The gattling guns are for my zaku project wich i will continue shortly.
Gattling guns are from AC models, this was a weapons package.
Here's a picture of them :
And as you have already seen i changed the front banner of my blog, im planning on doing this a few times in a year.
donderdag 27 augustus 2009
As requested
Well as requested a picture of my orderd stuff
There 5 sorts of thrusters if im not mistaken. You see them from left to right/smal to big. And as you just saw the tiny thrusters is really tiny about 3 mm. The largest one is a bit bigger than a gundam MG hand.
On the picture are 2 beam sabers that look more agressive, flexitube for the zaku project, aurora lens stickers (the're awesome) and last but not least some realy tiny rings (not sure where im gonna use them).
Ill make a post with pictures of my group-build project soon.
Sorry for the bad picture tried to get it better
donderdag 20 augustus 2009
New stuff just arived.
I orderderd some stuff with a fellow gunpla builder to make my mg mdels even nicer than they are. The pieces that arrived are :
- 2 special beam sabers
- 25 thin rings
- a hole lot of thrusters in al kinds of sizes
- some really nice lenses in rainbow color
- and last but not least flexible tube (zaku look a like)
Youll see them as i will build them on my models.
Or do you want to see photo's ?
- 2 special beam sabers
- 25 thin rings
- a hole lot of thrusters in al kinds of sizes
- some really nice lenses in rainbow color
- and last but not least flexible tube (zaku look a like)
Youll see them as i will build them on my models.
Or do you want to see photo's ?
zaterdag 15 augustus 2009
Group-build project
The group-build project is almost finished. Things needed to be done are detailing and painting of a few parts. I hoope to have it ready by the end of the week.
Also i've already started assembling the rvf-25. Now im not really sure if i am gonna paint it, because of al the moveable parts (and there are a lot).
Another reasen for the doubt is: my airbrush paint sucks. Im not happy with it at all. Thinking of using my tamiya paint in it. If there is anyone with some tips n airbrush paint please tell me.
Thats all for now.
vrijdag 24 juli 2009
Is that a breakdancing GM ??
Looks like my group-build project GM started breakdancing after i gave him the first layer of paint. As you can see he's completly black. This is because i want to try preshading on the little fellow. I also made only one photo so you wont see all the changes i made. The modding was not to hard to do because i did a simple job on it.
I'm not sure when the second layer will be on so stay tuned !
zaterdag 18 juli 2009
Typical dutch weather.
Well today is a typical dutch day, lots of anoying rain. Im testing my airbrush on the group-build project. Found out that working with an airbrush wil take lots of practice. But then something turned out really good today.
My main model seller from Morgenroete Inc. told me he had a summersale going on, and he had a good offer on the macross model i had an eye on(we also talked about it yesterday in the evening). well i could not refuse the great offer and jumped in the car to get the kit. the total package contains the following kits :
- rvf-25 luca custom 1/72
- vf-25 super parts 1/72
- macross base
his summer sale continues till 31-07-09
here is a picture of the model.
there will be more photo's of the model with parts when completed(if the readers dont mind since it aint gundam related).
and since it not gundam related check the new poll and give it straight answer.
dinsdag 14 juli 2009
Finally finished
So here it is still wet from the paint (MG zeta is standing on a piece of plastic to keep it nice and clean).
Well as you can see its pretty big, the MG zeta inside is to give you an idea of the size.
enjoy the pictures and i hope it will give sme of you an idea how to build it (or not lol)
I used matt white paint from a store called Praxis, it was there on paint (the cheapest one) and clear filler for the edges of the plexiglas.
All with all it was nice to build, i had a lot of help from my brother (thanks).
And the total kost was about 80-90 euro, it could be cheaper.
i bought the plexiglas called lexaan wich is many times stronger than glass and the stuff is pretty expensive.
the plexiglas that i was looking for was not for sale in the correct thicknes.
i hoped you enjoyd following this tiny project.
zondag 12 juli 2009
Almost done.
So here are the well promest photo's of my airbrush cabine.
In my opinion it looks really good, it ain't small but i have enough space in it to work on my models with the airbrush. I need to paint the complete cabine to make it look at its best. The cabine is going to be white on the inside and outside. And maybe when im more handy with the airbrush, i will make a drawing with my airbrush on the outside of the cabine. But thats only if im more capable of using the airbrush.
Well here are some nice fresh photo's just made :
This is a photo taken from the front i used pretty much bit's and bolts to put it together. As you can see i did nt remove the protective foil from the plexiglas, i did this because om gonna paint the wood inside and outside. When im painting it the plexiglas will be protected by the foil. When it will be operational i will remove the foil.
Here you can see the side. I drilled more holes in the metal than needed so there are some holes left. The metal is 6 cm wide 1 mm thick and 40 cm high. The metal will also be painted so it wont rust. (my airbrush paint is water based).
Here you can see the backside of the cabine. I made a tiny hole above the fan for the electricity wire.
I made a detailed photo of the bottom side. You can see a bolt with a round head put upside down. This functions as a feet that doesnt damage the surface under the cabine.
And last but not least a close up of the fan. You can see the cable going to the outside (the cable has an on/off switch). The 2 bolts wich are visible in the front are to be taken off, then you can put a filter behind it and put the round plastic part against it. Put the 2 bolts on it and tighten them and the cabine is ready for use.
Well this is it for so much. I will paint it and put some clear silicon filler on the edges of the plexiglas, after thats done i will make a photo with a MG gundam in it so you can see the actual size of it. For more details please ask.
vrijdag 10 juli 2009
airbrush filtercabine
Its almost done, i will finish it this weekend. there 4 things left to do.
and these are the 4 things :
-Put 2 little bolts under the bottom for standing.
-Mount the plexiglas.
-Make the edges in the inside airtight.
-Mount a filter in front of the fan.
If this is finished i will continu on my GM group-build project.
When the cabine is finished i will make some photo's of it.
zondag 28 juni 2009
General update
Well here is a general update on the project's im busy with. No photo's on this update (sorry will make some soon for you). Last weekend i was away on a mini vacation in England, i was planning on doing the update before the weekend but did'nt make it.
The zaku project is going not as good as i wanted. It is taking more time than i hoped and some parts are really a pain in the ass to mod. This is gonna be a time taking project and im thinking of doing other projects in between.
Whats done ? :
-head with led 80 %
-torso with real cockpit 70 %
-waist and hips 40 %
-legs 90 %
-arms 20%
-backpack 0 %
-weapon - beam staff/axe 0 %
For the group-build project the time is less of a problem. I've got all the parts i need for th project. Also im thining of using the gm as a test model for the airbrush. just the easy stuff no weathering or stuff like that. I will do this project before continuing the zaku.
The spray cabin is going pretty good. im building it with my brother and he will make some parts for it on his work. it will make the spray cabin stronger and better. The parts he's making are connecting the wood with the transparant plastic.
Wel thats all for this update if you have any questions or something like that please ask them.
maandag 15 juni 2009
chibicon convention
well last weekend was pretty suprising. i didn't mentioned it before, but i went to the chibicon convention in houten. i really didn't expect so many cosplayers at one place. it was almost frightening hahahaha. gundam wasn't a real big thing there (bummer). but i got the oppertunity to meet some fellow gunpla builders wich i only speak trough forums. my compliments to some people on chibicon, they got really nice looking outfits wich were almost straight out of the series/games/movies they wanted it to be. i tink i can make a book of the whole day at chibicon, but i think its better for you to see some pictures.
here is some merchandise that i bought on chibicon. as i already told you there was a lack of gundam on the whole convention, so not as many gundam kits as i hoped to see. i bought two action bases for char's suit's (MG) and two figures of final fantasy
cloud on fenrir bike from, final fantasy: advent children
squall from, final fantasy 8
2 action bases
and here is the album with chibicn pictures.
i will comment a few foto's later.
picasaweb.google.nl/marc261987/Chibicon
(made possible by jesper, paulo and marc)
maandag 8 juni 2009
filter-system for the airbrush
as i mentioned before i need a filter system for my airbrush. of else my room wil become a mess with little paint dots all over it. i went looking on the internet for a home made version and found this dutch person with an awesome filter-system.
just take a look at it and see for yourself. i already bought 90% of the parts and i will list them on my blog in the next couple of days
http://rocodil.blogspot.com/2007/12/spuitcabine-zelf-maken.html
my brother made a 3d sketch of the filter-system that i am going to build.
so what do you think ?
some spec's as requested:
the fan is a 16 watt 230 volt fan, 50 hertz with a diameter of 125 mm. it wil suck a massive 185 M3 in an hour (hahaha i know there are much bigger fan's but think about it 185 m3 is pretty much)
vrijdag 5 juni 2009
first try with the aibrush
so here are some pictures of my first run with the airbrush. i found out that i need a spray cabine for sure. i saw some great ideas on the internet about spraycabines.
well the pictures i took arent the best looking (think it's the camera).
i had a rgm-79n gm custom MG wich needed a recoulor. i tried this a few months back, but it went to a disaster. so i took the shield and i got some black airbrush-paint, mixed it up in the airbrush cup and gave it a try.well the only thing left to say about the result is : see for yourself
as you can see i sprayed some paint across the box that i was using as a spray cabine.
donderdag 4 juni 2009
group-build project
i started this project typing in dutch, but i am going to continu it in english. so here is a new post of the subject : group-build.
i sanded the complete model today and some brainstorming today. not sure about the colors but i know where i am going to modify the model. i am not telling you what im modifying , only the piece/place. to give you an impresion, here is a picture with the points.
if you have any ideas about a colorscheme just say so.
donderdag 28 mei 2009
finally it's here "my airbrush"
this topic is about my new and first airbrush that i bought today. wel here are the pictures i just took over the airbrush. i you have any quistions about the airbrush, cmpressor, paint of something else -> just ask.
here is the airbrush
its from a german manufacturer. it is an harder and steinbeck evoluition silver line 2 in 1
i got the opertunity to test the airbrush before i would buy it. and i think it is an amazing piece of technology. it has a 2 cc cup, a 5 cc cup, and a 0.2 mm needle/ nozzle and a 0.4 mm needle/nozle. its realy easy to clean, but you realy have to be carefull with handeling the nozzle and needle. i wil need some time and much practice before i can make a good looking model hahaha airbrushing is realy a great art to do..
here is the compressor
it has a filter, wich takes out the water that hangs in the air. there is also a meter on wich displays the air-pressure its suplyning. and a regulator to control the flow/pressure air it delivers. its an iwatec aircompressor
the compressor turns of automaticly when it has enough airpresure, and turns on when its tolow to use your airbrush. it hardly makes any sound wich is a good thing.
airbrush-holder
if you're working with your airbrush, you'll need a standard to put you airbrush in if you need your hands to be free for other work. i bought this standard with my airbrush and it can hold up to 4 airbrush-pistols at the same time
the airbrush holder is realy easy to use. you can mount is on a table or on something else. if you got the it mounted on a table you can turn the airbrush-pistol holder to any desired position
paint
i also bought 8 colours of airbrush paint i will explain more about this when i used it a few times. i took the base colours that everbody needs for painting and some colours i will need for specific use like pink (hg aegis and mg infinite jusitice)
here is a foto of the paint
dinsdag 19 mei 2009
blog update
als eerste wil ik bij deze melden dat ik overstap naar mijn artikelen volledig in het engels te schrijven, beginnend met deze update. heb je hier moeite mee of wil je iets vertaald naar het nederlands zegt het me even. ik doe dit i.v.m. buitelandse volgers van mijn weblog. ik zal de stijl van het blog later ook volledig omzetten in engels.
so here is in some way, a new start. my blog wil continu in they english language, because fellow gundam builders from other countries then the netherlands are following my blog.
im almost done with my school (yeaaah can't wait). at the moment im thinking of buying an airbrush. and maybe getting some macross models (dont know the series but the models look awesome). also when i have enough time im gonna try to proceed with my zaku project.
that's all for now, ill try to make some more update's in the weeks ahead.
comments can be posted or e-mailed to my email adres
also check the new poll i made and give me your opinion about it please.
maandag 20 april 2009
a special delivery uit japan !
maandag 23 maart 2009
MG ZGMF-1001/K Slash ZAKU Phantom Yzak Joule custom
jullie kozen als meeste voor mijn secret mg project en kijk hier is hij dan.(poll is nog niet afgelopen maar deze heeft bij uitstek de meeste stemmen).
na de gundam group build wordt dit mijn volgende project.
het is de MG 1/100 zaku van Yzak Joule uit seed destiny
vele van jullie weten dat deze niet bestaat. sommige mischien ook wel niet. ik heb bij me vorige project de aandacht genomen voor weatheren van de gundam. dit keer zoek ik het in een iets andere hoek. namelijk een HG 1/100 blaze zaku phantom om een MG shin matsunaga zaku 2 skelet heen te bouwen. ik zal hier en daar tegen probleempjes aanlopen, maar die zal ik allemaal zo mooi mogelijk weg werken. ik verheug me zeer op het bouwen van dit model.
ik heb voor dit model al binnen gehaald:
-mg shin matsunaga zaku 2 custom
-hg heine westenfluss blaze zaku phantom
-gundam seed waterslide decals
-een hy2m zaku 2 mg led hoofd
ik heb de dremel uit mijn topicje gereedschap hoofdzakelijk aangeschaf voor dit project, hiermee kan ik binnenwerk van de HG onderdelen makkelijk verwijderen. en zoals jullie hieroven kunnen lezen komt er een ledje in als camera/sensor het is en rode die bestemt is voor een 1.0 mg zaku 2 black tri star. ook deze wordt onder handen genomen en ingebouwd.
voor wie het nog niet was opgevallen de gatteling guns op de rug zijn niet in HG of MG serie uitgekomen, ik heb hiervoor evergreen plastic aangeschaft en ga hier zelf de guns uit maken. verder ga ik de HG onderdelen meer uit elkaar halen zodat de knieen en ellebogen bijvoorbeeld uit meer onderdelen bestaan en meer bweging erin. ook komt er een echt werkend cockpit-deurtje in zoals iedereen gewend is van de MG serie.
04-04-09
ik heb intussen het skelet van de zaku in elkaar gezet en ben al et de helft aan het passen om jullie even te laten zien of dit ook lukt of niet, is hier een foto waarbij het wel is gelukt namelijk een onderbeen ervan
zie hier de update
03-05-09
weinig werk in een maand tijd gedaan helaas, ik heb 1 been van de zaku nu zo goed als af. mischein laat ik de voet nog iets meer zakken voor meer beweegbaarheid. ook heb ik de torso nog even onder handen genomen. de cockpit is ngeveer 5 mm verlaagd zodat deze mooi uitkomt voor de armor opening. op de foto heb ik 1 zijkant van het onderbeen weggelaten zodat de binnenkant en de voet goed te zien is. zie hieronder de foto's van mijn kleine update
Van MG zaku custom |
woensdag 18 maart 2009
tussendoortje namelijk een group build van het gizmoxia forum
Ik doe mee (voor het eerst) aan een group build. Dit wil zeggen dat in een bepaalde tijdslijn van gundam er een "era" wordt uitgekozen. Met vaak een bijbehoorende scene/oorlog/fragment.
hiervan wordt een type of meerede type mobile suits gekozen. Iedereen die mee doet kiest hiervan eentje die hij voledig naar eigen wens aanpast. Alles mag zowel verf als modificeren van de suit zelf. ik ga nog niet verklappen wat ik ga doen en in welk theme maar hier hebben jullie alvast een voorproefje welke suit ik ga aanpassen.
voor de duidelijkheid dit zijn 2 voorbeeld foto's de echte moet ik nog maken
ik begin aan dit projectje zodra ik klaar ben met de strike launcher
Abonneren op:
Posts (Atom)